As the winter season looms ahead, most people in cold-weather states plan to hibernate and wait until spring to plan their next adventure. But why endure the winter when you can embrace it, spending your time outside, experiencing what most people would never even think of?
Would anyone consider camping when there’s a threat of rain in the sky, let alone snow? “Because it’s there,” as erstwhile Everest climber George Mallory is often quoted saying. Camping is a challenge to put yourself outside your comfort zone, regardless of the season. Winter camping simply amplifies the challenge and provides some significant advantages over traditional camping too.
To get some guidelines, we spoke to an expert about setting up camp in the colder months. Joe Jackson is an outdoors program specialist with REI. He takes to the woods and waters of Minnesota by canoe, sled and hiking trail, happily introducing others to a life well lived in the outdoors, and he’s also an enthusiastic winter camper.
REI is a leader in outdoor experiences across the country, and thanks to the field programs that people like Jackson run, a lot of these things can be learned at workshops in stores in the northern parts of the country.
“You’re increasing the difficulty level on many of the same camping safety precautions,” Jackson tells us. Hiking? Harder. Gathering firewood? Harder. Finding water? Harder.
Plus, daylight ends so much earlier in the winter months. “In the summer, you might be making dinner at a campsite at 7, 8 o’clock,” he says. “On the shortest days of the year, you’re going to be preparing to turn in at 5, so be aware of what you need to get done in daylight.”
Here’s what you’ll want to consider:
Clothing
“Staying warm and staying dry – much of this comes down to layering your clothing. You want to stay insulated from the cold outside but not so warm during any given activity that you begin to sweat,” Jackson says.
Think of everything you put on your body – gloves, socks, pants, shirts and jackets – as a system made up of components that can be added or removed as necessary.
Look for clothing that’s either synthetic, wool or a blend of both. “Both wool and synthetic layers will keep you warm even when they’re wet,” Jackson says. That’s not the case with cotton, so avoid wearing things like cotton socks and T-shirts; they won’t do you any good in the cold.
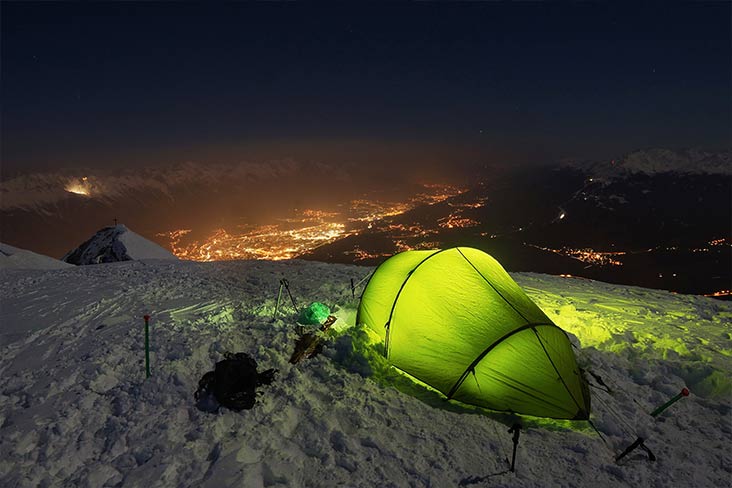
Photo: Sam Marx / Unsplash
Shelter
When thinking about camping in colder months, another top priority to consider should be shelter. A roof over your head and walls around you will not only allow you to get out of the snow and wind, but the added protection will also help rescue body heat and keep you warm while the air temperature plunges well below freezing outside.
But don't run out and purchase new gear. “You can experience your first overnight in colder winter weather with the tent or tarp you already have,” Jackson says. “Basically, it’s how much comfort you’re willing to pay for. Shelters can range from the tents and tarps you already have in your summer camping kit, a three-season tent to four-season tents, to hot tents that include stoves or a shelter built from the snow at the campsite.”
And you don’t necessarily need a tent. Along the Appalachian Trail, for example, there are more than 250 permanent shelters that anyone can use to protect themselves from the weather. Most of these shelters are lean-tos – an overhanging roof with three walls, open to the elements on one side.
Others are more closed to the weather on that fourth side, but all of them are pretty primitive. Nevertheless, they provide enough shelter to get inside from a raging snowstorm or to block a frigid, rain-laced wind.
Another option is snow shelters. Depending on what the landscape looks like, snow shelters can still be a great means of winter shelter. Gear Patrol has an excellent primer on emergency winter shelters:
Snow Cave: An emergency shelter built to help you escape impending bad weather. A snow cave requires the fewest tools and takes the least amount of energy to build. It’s simply a bell-shaped cave dug vertically into a snowbank. A ceiling higher than the cave opening creates a heat trap that holds body heat inside while cold air escapes.
Tree Pit: A shelter built in a tree well – the area under the lowest boughs of an evergreen tree and the ground, where snow has trouble piling up. Dug out to the edge of the boughs and covered with excess boughs, a tree well in deep snow can be an effective shelter.
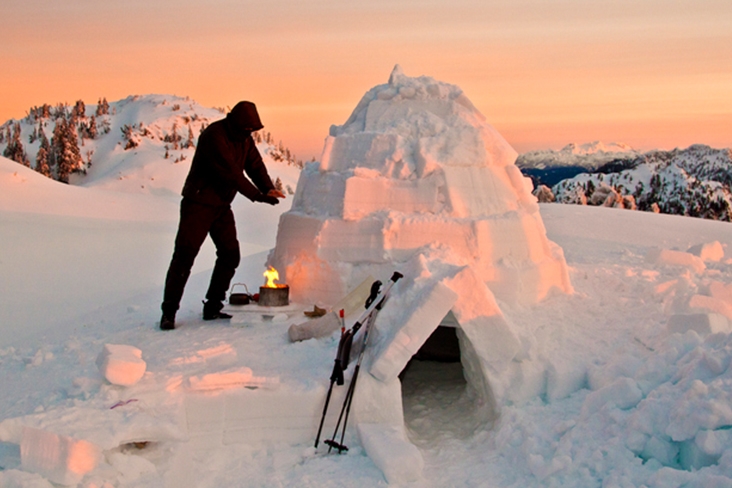
Photo: Christopher Kimmel / Getty Images
Quinzee: What most people think of as an “igloo,” a quinzee would take the most time, effort and skill of all the rudimentary winter shelters, but it provides the most durable shelter and can be the most comfortable to live in for a time.
All three of these shelters should be considered in an emergency, but most people who winter camp are going to do so with a tent. There are a few considerations to think about before you decide to camp in a tent in the winter months:
Three-Season Tents: If you have a tent, there’s about a 99.9% chance that it’s a three-season tent. A tent like this is usually identified by thin nylon walls and has an emphasis on airflow rather than heat retention. Large window openings with screens are more effective at keeping the bugs out than keeping the warmth in. They’re also not suitable for use in the event of a heavy snowfall.
Four-Season Tents: Four-season tents are built to withstand a lot more of what winter throws at you. They’re built with less mesh, stouter canopies and rain flies, stronger pole structures, and even blanketed insulation that provides significant warmth and sound insulation at night.
In a test of its Tri model, Crua Outdoors ran small space heaters on a low setting for a total of 12 hours to replicate the heat two humans would generate when inside an enclosed structure. With an outdoor temperature of roughly 40.3 degrees Fahrenheit at the end of the test, a single-walled winter tent maintained a temperature of 47.7 F and a three-season ultra-lightweight tent, 42.3 F. The Crua Tri’s interior temperature stayed a balmy 58.6 F.
Four-season tents may be heavier to pack in and out of a campsite, but that 10.9-to-16.3-degree temperature difference is going to make it all worth it. Throw in some wind and the effect would be even more pronounced.
No matter what kind of tent you’ll be using, Jackson has a word of advice: “Most tents aren’t designed to have any insulating properties; this is going to happen in your sleeping bags.” Four-season tents generally provide better structural soundness under a snow load but not necessarily better insulation than a three-season tent.
Yet a tent’s structural soundness can be crucial during winter camping. “The more extreme the winter weather conditions are expected to be, the more you’ll want a specialized tent. High winds, snow load – four-season tents are built to defy these conditions, being built with more wind-resistant fabrics and a tent pole geometry that is dome shaped,” Jackson says. “This dome profile is strongest when under a stack of snow or strong winds. These tents are often designed for mountaineering, but that reliability can certainly be appreciated on flatter lands.”
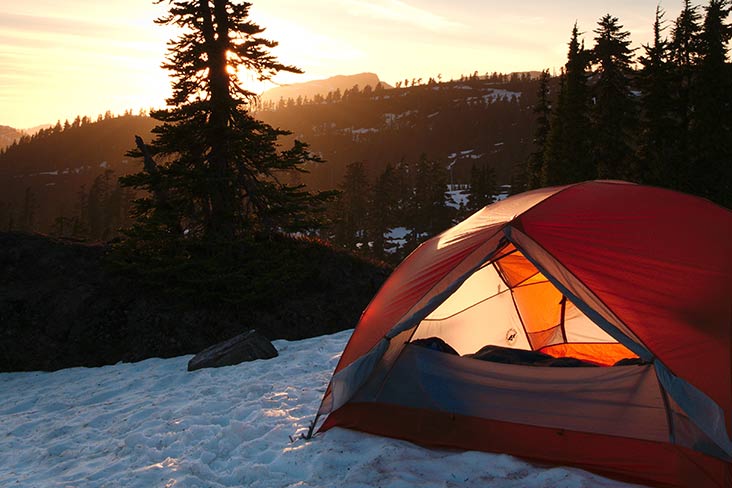
Photo: Eddie Lawhead / Unsplash
Site Selection
In the summer months, your biggest consideration in selecting a campsite is generally whether the ground is level. In a worst-case scenario, a raccoon might fall off a branch onto your tent. (Yes, this actually happened to me.)
The winter is a whole different ballgame, though. REI has a list of important things to think about before you set up a tent:
Wind Protection: Check the direction that the wind is coming from. Is there a group of rocks or a stand of trees that can provide some shelter from the wind?
Water Source: If you’re not close to a good source of water and there’s snow on the ground, it may be your most reliable water supply if you can melt some.
Avalanche Risk: Something you don’t need to consider in the summer is whether tons of snow will come sliding down a mountain face on top of you. Camping on or near a slope isn’t advised.
Overhanging Branches: While low branches may help provide additional cover, they can also be disastrous if they break. Consider this carefully, especially if wind or heavy snow is in the forecast.
Sunrise: Where is the sun coming up? Can you maximize exposure to the sun to help warm you up in the morning?
If you’re camping in the cold and there’s no snow on the ground, setting up your tent is straightforward. If there’s snow on the ground, though, you’ll want to follow a few steps:
Pack the Snow: Don’t set up a tent on loose snow. At the very least, stamp out a flat spot with your boots. If you have snowshoes or skis, flattening the snow will be a lot easier.
Consider Building a Snow Wall: If wind is a problem, you should consider packing snow into walls around your tent to help stop the wind.
Be Aware of Sharp Objects: Half the stuff you have with you has a sharp edge on it: skates, skis, crampons, snowshoe cleats and ice axes. You can easily poke a hole in your shelter with any of those objects, so you’re better off leaving them outside the tent.
Sustenance
Your most important consideration is hydration. People typically think of dehydration as more of a summer risk, but nothing will strip the hydration out of you faster than heavy exertion in the cold. It can lead to severe fatigue and prevent your body from even recognizing that its core temperature is dropping.
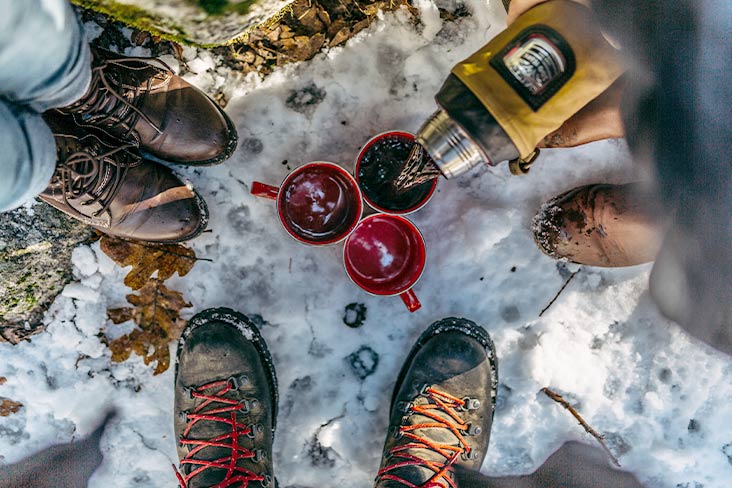
Photo: Nathan Dumlao / Unsplash
You’ve got three possible sources of water when you’re out in the weather:
Fresh Water: Lakes, rivers, ponds, streams, etc. Anywhere there’s ice, there’s water under it. You’d be safest using a water purification device to make sure that the water is safe to drink.
Snow and Ice: If you have a stove and a pot, you can melt snow or ice. It’s not going to taste great, but it’ll work. Also, if you have a black or dark-colored plastic tarp and some strong sunlight, you can melt snow or ice that way.
Pack It In: Bring plenty of water in an insulated container. To keep it from freezing, you can leave the container in your tent inside your sleeping bag, or you can pack it in the snow. Leave the container upside down, so when you flip it over, any ice that forms will be on the bottom. Also, if you add any juice to it, know that this will raise the freezing temperature.
What you put in your system during your camping trip is going to provide the fuel that makes the difference between an amazing adventure and possible misery.
Food on the Move
If you’re winter camping, you’re probably not spending a whole lot of time lounging around the campsite in a beach chair reading a trashy novel. Winter camping is usually accompanied by some kind of strenuous activity, such as snowshoeing or backcountry skiing.
The food you take with you on your adventure should have four requirements:
Packable: Soup may be nice, but it’s not the easiest thing in the world to stick in an inside pocket.
Quick To Eat: This isn’t a sit-down, three-course meal. It’s something quick that you may be consuming on your way somewhere else, eaten out of a heavily gloved hand.
High in Calories: Winter camping isn’t the time for a salad. According to the University of Minnesota’s Outdoor Skills course, your caloric needs during heavy activity in the winter are anywhere from 3,600 to 6,000 calories per day. Carbs should be 50% to 60% of your intake, with fats representing 25% to 30%, along with 20% devoted to protein.
While you may want to avoid simple sugars and starches most of the year, when you’re snowshoeing up a 15-degree incline in 10-degree temperatures, it’s the one time you can feel good about eating a candy bar.
Freeze Resistant: If you’re on the move, your food is going to spend a lot of time in a backpack. When the temperatures are well below freezing, select foods that are resistant to freezing. So, don’t regift that fruitcake this holiday season – not only is it the perfect combination of calories in an easy-to-eat form, it’s also more resistant to freezing solid than meat or cheese is.

Food at Camp
At your base camp, you have a lot more flexibility because you should have a camp stove or an open fire to heat whatever it is you’re about to eat. The caloric requirements are still the same; you’ll need to jack your caloric intake and run with that 60/20/20 ratio of carbs, fats and protein, just as you would while you’re on the move.
The food you make at camp should be:
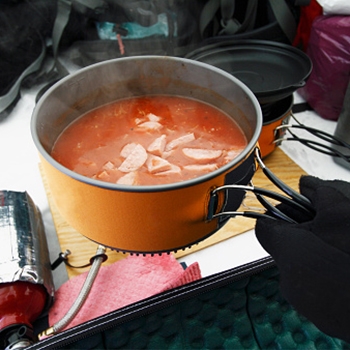
Quick To Prepare: We’re not aiming for Star Baker here. We’re looking for hot, highly caloric foods that can be cooked in a reasonable period of time with a minimum of preparation. In fact, preparing meals, such as chili, ahead of time will make dinner a lot more pleasant as the sun begins to set at 3:30 in the afternoon.
Hot: Hot foods on the move aren’t a great prospect, but heated foods in camp are a necessity. They’ll not only fill your belly – they’ll make you feel better in general.
Easy To Clean Up: This isn’t the time for lobster and steamed clams. You want foods that can be quickly cleaned up and probably eaten from the pot or container they’re prepared in.
Chili in individual heavy zip-close bags can be heated in boiling water and consumed straight out of the bag. Prepared foods in foil pouches are available at REI and other outdoor stores. Whatever you do, be sure that you leave your campsite in better shape than it was when you arrived.
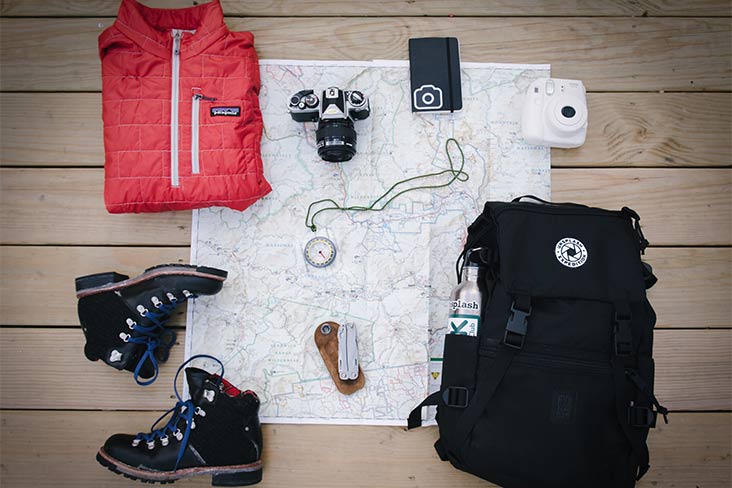
Photo: Alice Donovan Rouse / Unsplash
First Time? Stay Close To Home
For Jackson, one of the best experiences you can have is camping in the winter right in your backyard, and it’s not just about getting the feel for your equipment. It’s about seeing your own environment through fresh eyes.
“It’s a low-risk, fun arena,” he says. “I’ve left a four-season tent in the backyard all winter one season. Wind and snow still drift up, the fire pit’s a short distance away and I’m still within the Wi-Fi range streaming Frozen Planet on Netflix.”
He encourages people to look for opportunities to go on “microadventures.”
“Creating a progression toward your outdoor aspiration is a great strategy for comfortably and confidently reaching it,” he says. “Take small steps and increase your challenges incrementally, and learn more comfortably along the way.
“Starting in the backyard, you can step back inside anytime. Maybe you find you need more practice with tent setup or didn’t realize you need to practice with gloves on. Maybe this first attempt at igniting your liquid fuel stove isn’t working, so you can head inside to diagnose or research. This is your low-risk practice arena.”
And, he adds, for the first time out, you can always lay the seats down and get inside your Subaru.
Gear Checklist
You’re driving a Subaru, so space for your gear isn’t an issue. But it’s easy to turn a simple overnight trip into something that looks like a month-long journey across the Atlantic in a steamship.
REI has a great list of winter camping essentials you should check out in more depth. The list includes:
Navigation Aids: map, compass, GPS
Sun Protection: sunscreen, lip balm, sunglasses
Insulating Layers: jacket, vest, outer pants, base layers, gloves, hat, socks
Footwear: insulated winter boots
Light Source: headlamp, flashlight, batteries
First-Aid Supplies: antiseptic wipes, antibacterial ointment, butterfly bandages, nonstick sterile pads, medical adhesive tape
Fire Starters: matches, lighter, waterproof container
Tools: multitool, knife, food-prep tools, any required tools for stove
Nutrition: food and cooking source for as many days as you need (propane/butane/alcohol)
Hydration: water bottles or a filtration system
Shelter: tent, tarp, reflective blanket
Sleeping Gear: sleeping bag, bag liner
The most important thing to do before you leave is to let friends and family know where you’re going and how long you expect to be gone. If you can’t check in from time to time, at least they’ll be able to get help if you haven’t turned up when you’re expected.